
Processing a Milky Way landscape composition for the first time can be challenging, but luckily for Focus, we have a young expert who has graciously provided a step by step guide on how to post process a Milky Way landscape photo. Thank you Flynn Armstrong. Just a note. It is assumed that you have knowledge using layer masks and the basic functionality of Adobe Photoshop.
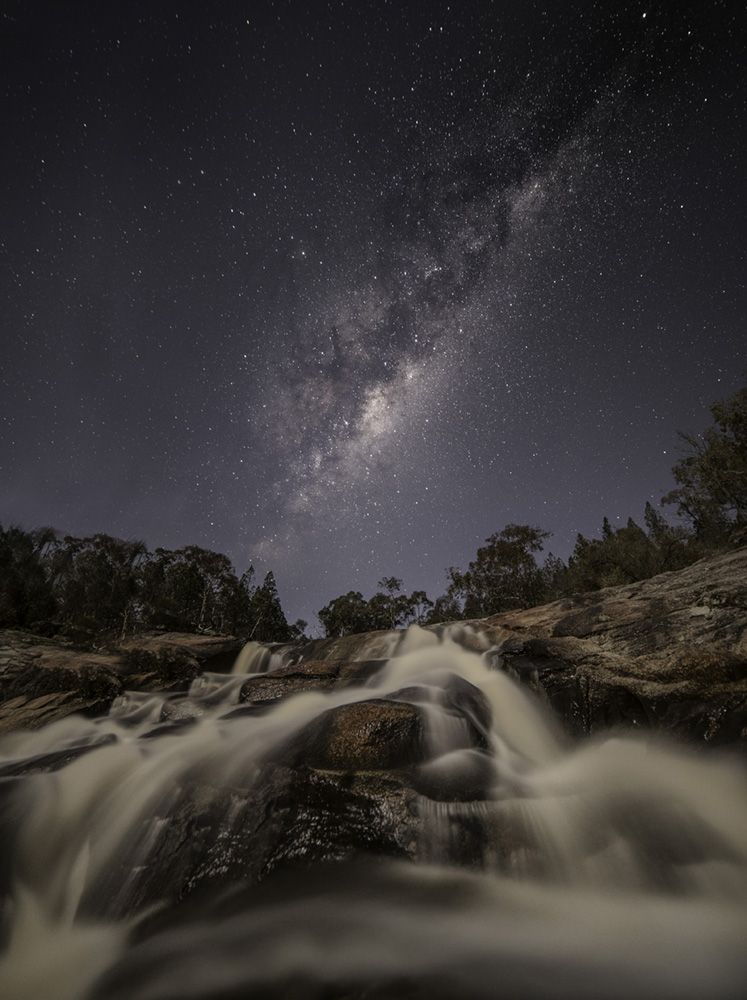
I’ve noticed that a lot of people have trouble editing Milky Way shots and I recently helped Jason Bunce do an edit of one of his shots. I thought fellow photographers within the Focus community may benefit from seeing my process. Is there only one way to process a milky way photo? No, absolutely not, as with any other landscape photo and photoshop there are myriad ways one can approach post processing a photo. This is my approach. Here’s the EXIF from the shot.
Camera Model : Sony A7s
Lens : Rokinon 14mm
Aperture : f 2.8
ISO : 2000
Shutter Speed : 20 seconds
If you would like to view the final tiff file, there is a link at the bottom of the post.
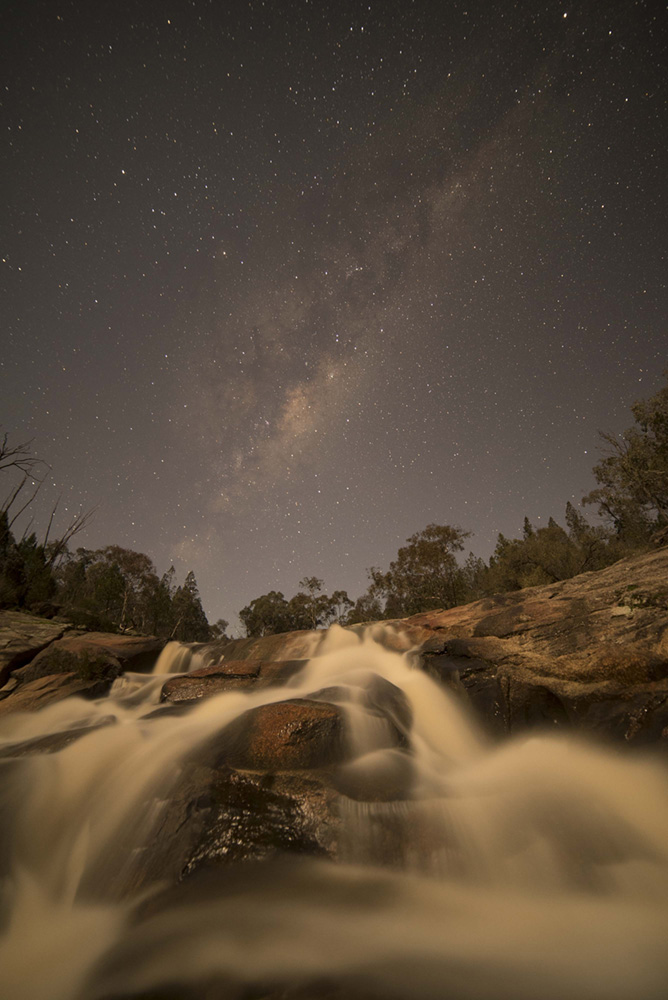
1. My initial impressions were that I liked the shot, but I thought the composition would benefit with a bit of widening so using the clone tool and some other manipulations I widened it out. Its not perfect but it worked. I also did a basic white balance adjustment to the whole image.
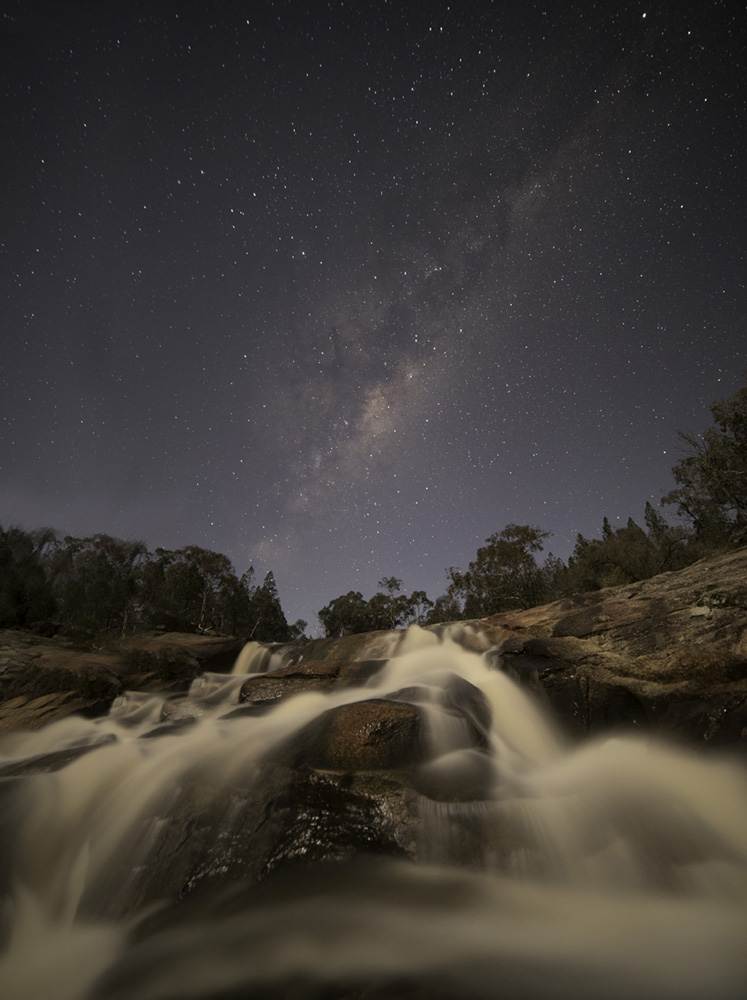
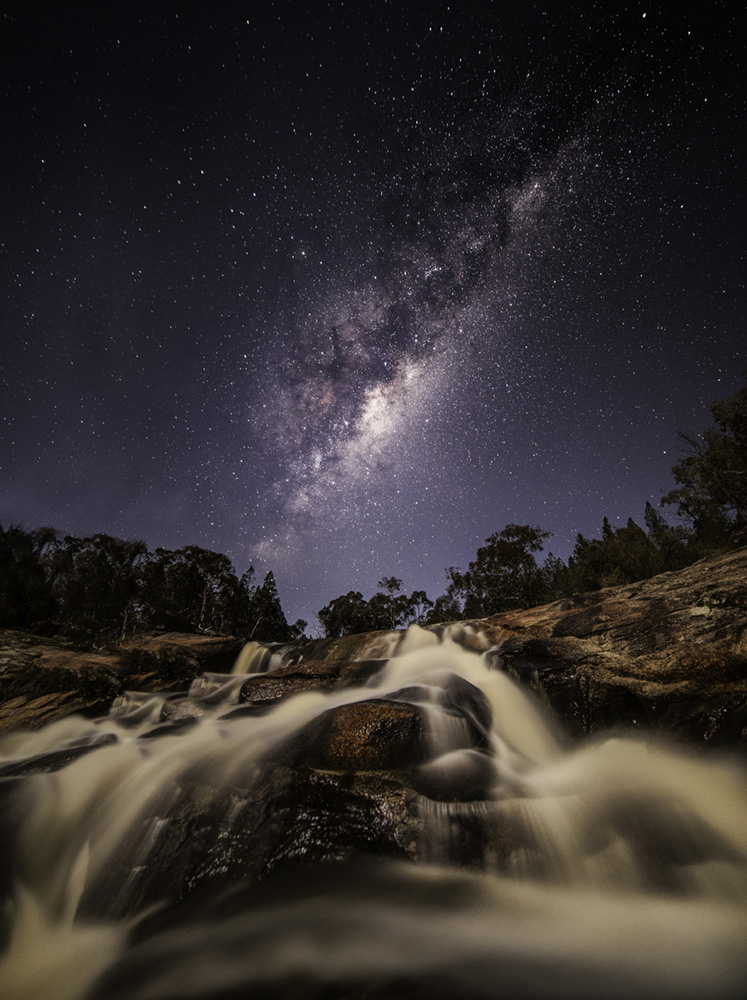
2. I then did a white balance adjustment to just the foreground and created Luminosity masks. I have not included them in the tiff file because they really increase the size of the file but Greg Benz has a free mask panel which you can download.
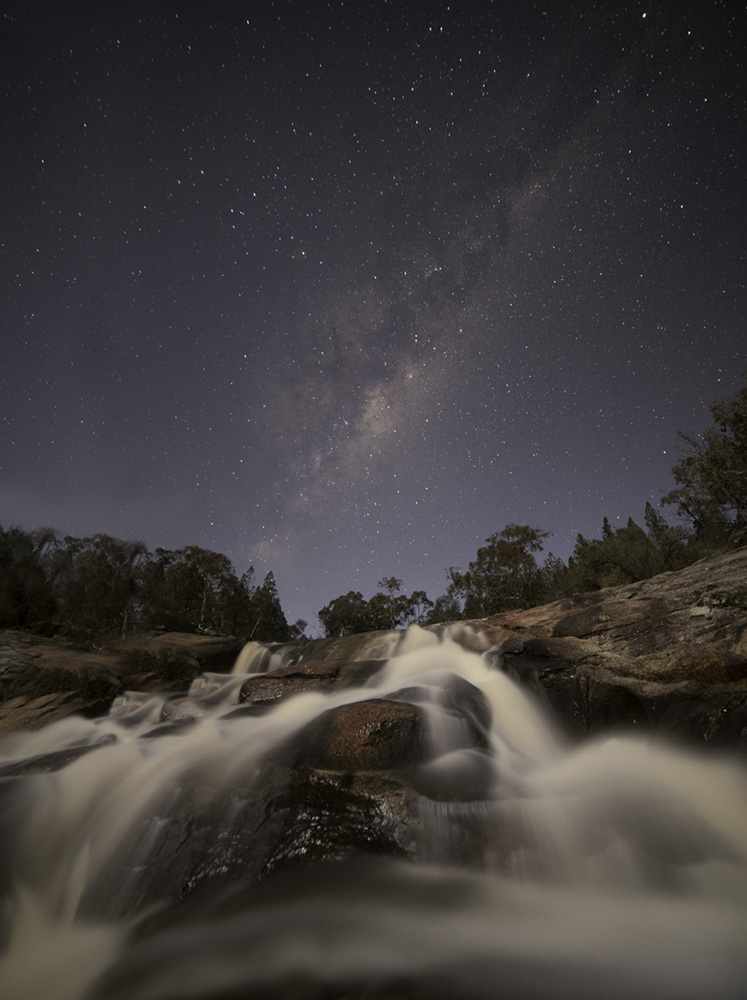
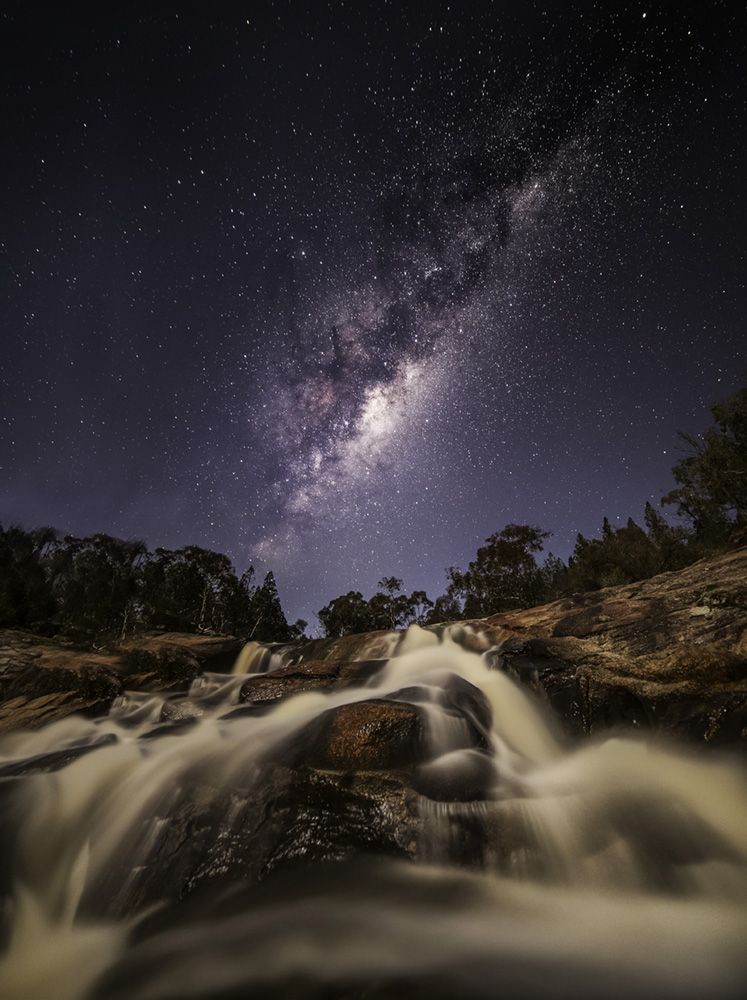
3. The next step in the process is to really bring out the detail in the Milky Way and this is my technique:
- In Photoshop I create a duplicate of the original layer then I go into adobe camera raw and turn up the clarity to 100 then repeat the same step.
- After that I create a mask and invert it so it is black and not showing through.
- I use a brush with a low opacity and paint with white to paint in the clarity with precision so it only brings out the detail where it’s needed.
- For this particular the primary areas I added clarity was to the Milky Way and the water flows and rocks.

4. I wanted to accentuate the reds in the Milky Way, so I created a red shape layer and again using a layer mask and a brush with low opacity, I brushed in red to the parts of Milky Way.
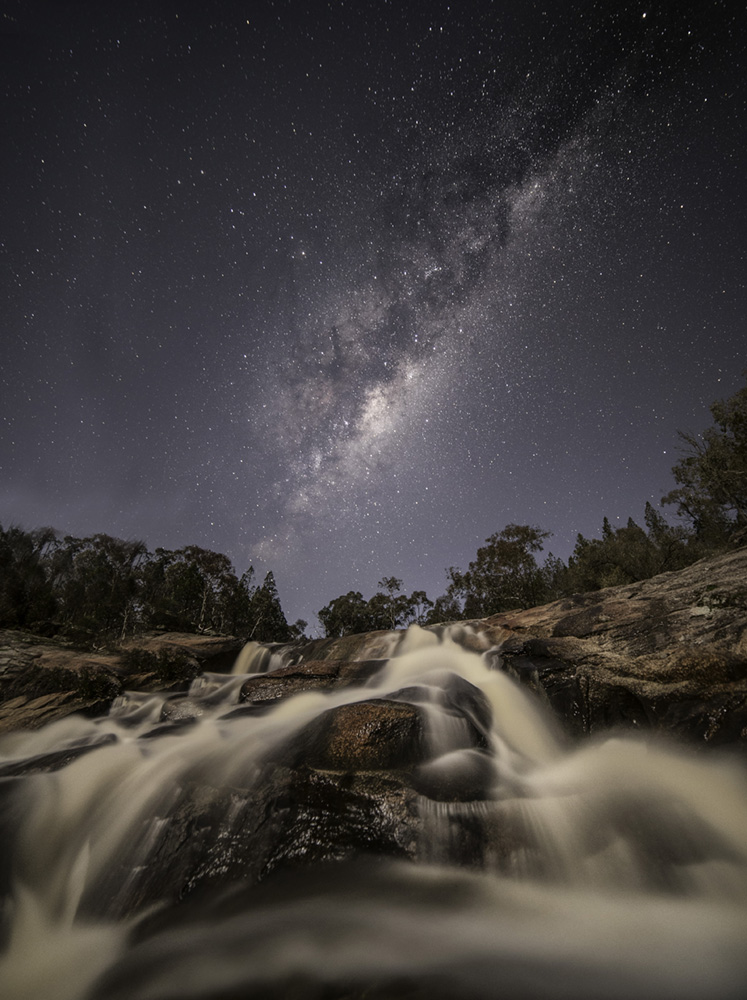
5. I then reduced the overall brightness and contrast of the whole image.

6. I then selectively added contrast to just the Milky Way. This can be achieved by either using a simple S-curve curves adjustment or adding brightness/contrast through the Image-Adjustments. Be sure to do this on a seperate layer.
7.I then selectively added some saturation to the image. Again this can be accomplished by adding a Saturation adjustment layer and then through layer masks, painting in the saturation to areas such as the foliage, rock and sky and a global adjustment to the contrast and brightness of the image.
8. I then wanted to adjust the shadows and bring out more detail. Using the luminosity masks created in step 2, I made adjustments to the shadows of the image.

9. To add detail and accentuate the Milky Way a brightness/contrast adjustment layer was added and brushed in on just the Milky Way.

10. As you can see by all the steps, the key to my approach is making the Milky Way prominent and in this next step, I darkened the dust clouds. This can be done by using a curves adjustment layer or using a layer with 50% grey set to soft light and painting with a black brush with a very low opacity.

11. I merged all layers and my preferred method of sharpening is take it back to ACR and sharpen.

12. This is the result of all the steps. I would like to thank Jason Bunce for letting me use his image.
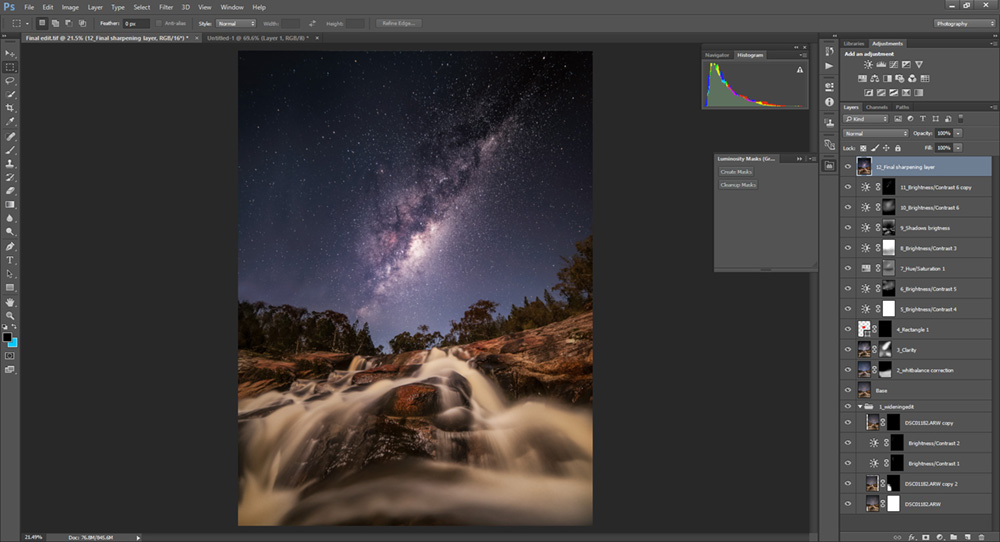
For those of you interested in the layers and how they look in Photoshop, here’s a snapshot.
For those of you interested in the tiff file, you can access it here