
By – Glenn Crouch
UPDATE: This article has been updated in 2017.
How to use Skippy Sky in conjunction with other cloud prediction sites such as WindGuru and WeatherZone
This is a basic guide on how to use 3 sites to obtain an idea of what sort of cloud you may see at your chosen photographic location. For the purpose of this guide, I will use the Sydney region. To give yourself the best chance of a great sky, it’s important to combine these 3 sites to allow you to make the best judgement call you can.
*IMPORTANT NOTE* – if you monitor these sites starting on a Monday, and check them each day at least once, you’ll quickly realise how often the forecast will change. This is why, if you’re planning on a shoot for a Saturday, it’s generally not worth starting to check the forecast until Friday at the earliest. Long range weather forecasts should only be considered a very rough indication at best.
SkippySky :
For Sydney region, click on Sydney / SSO
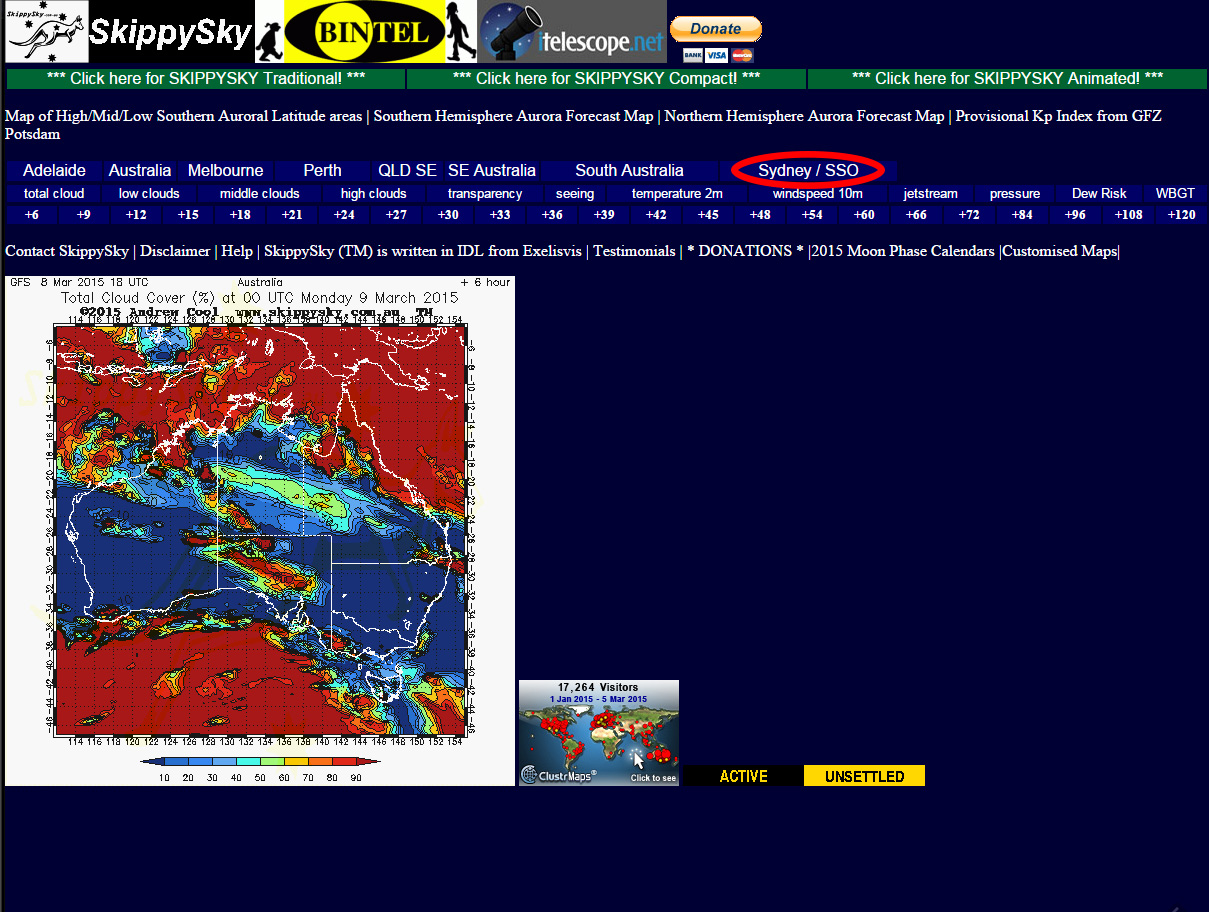
Once the map loads, you’ll see a large overview of New South Wales. This is a rough guide to locations so you can orientate yourself.

Now you’re looking at the most recent cloud forecast. It’s a good time to remember what SkippySky is actually for, and that is it’s for astronomers whose main enemy for stargazing is cloud cover. Hence the colour scheme used on the site. So red cloud is generally thickest and most dense as it obliterates any chance of seeing the night sky.
You’ll see that there is a bar that lists 3 hourly time blocks, which you can click to cycle through closest to sunrise or sunset. It’s a good idea to look at the time blocks before and after the shoot time, as it will give you an indication of cloud movement and density.
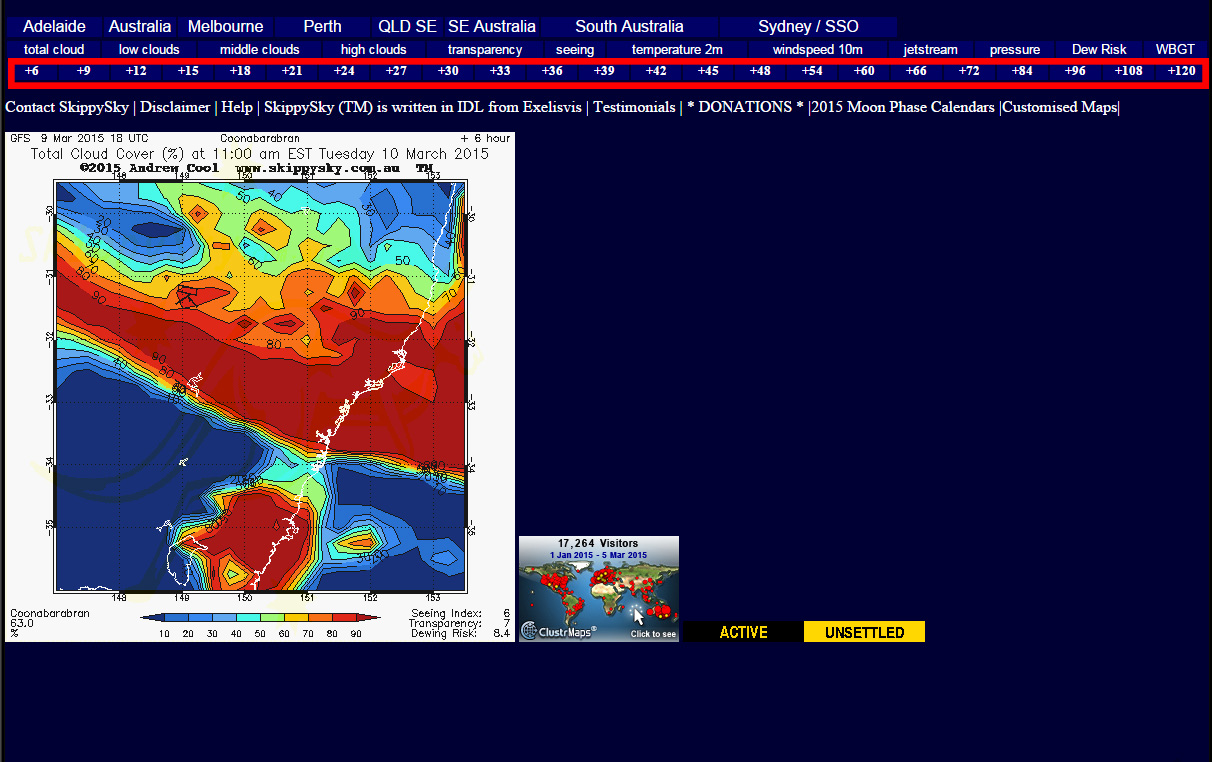
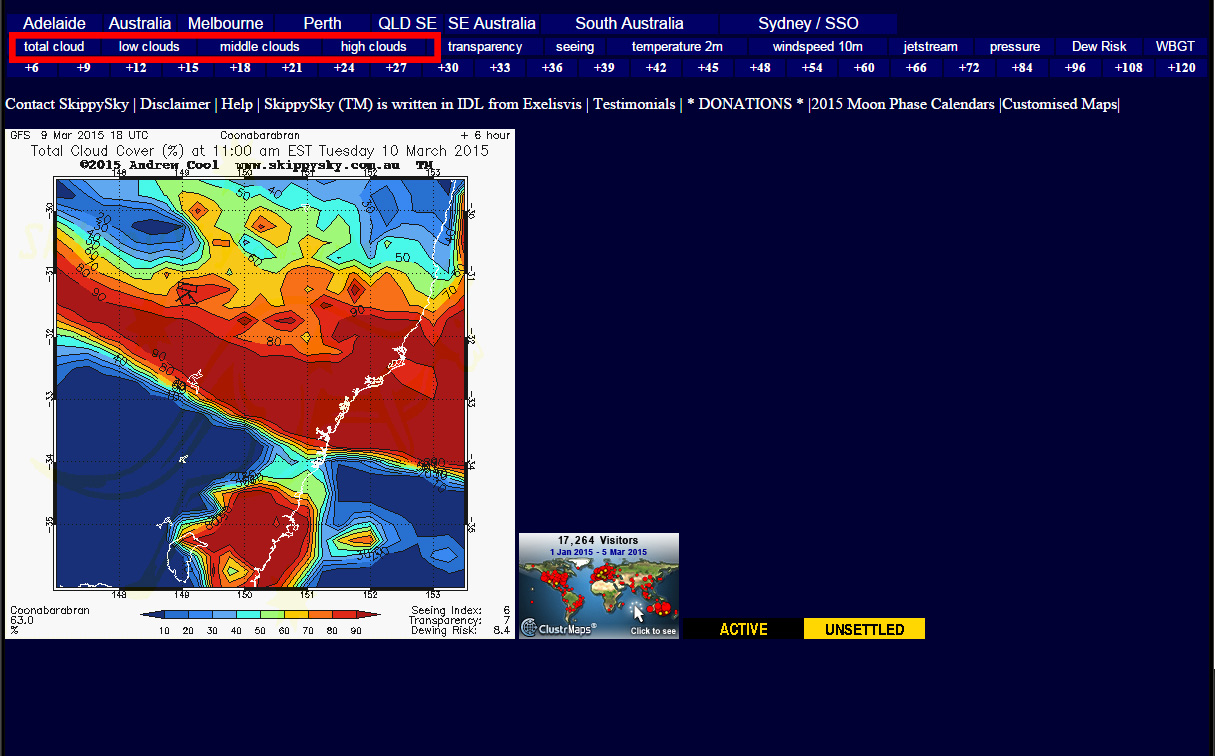
Once you’ve got the time frame you want to check, you can now break down the view by level of cloud. This will give you an idea of the composition of the sky. As a general rule, most colourful sunrises/sunsets are generated with high cloud. However you can also get colour with lower level cloud. If you’re after dark and moody shots, then lower level and denser cloud may be better to wait for.
It’s important to note here that even if the area over your location looks clear, if there is cloud nearby there’s a possibility that cloud on the edge of the coverage may appear over your location. Remember it’s not an exact science ! If you monitor the site over a 12 hour period you’ll see how the forecast will change, sometimes quite dramatically, so it’s worth checking it as late as possible before you commit to getting up for a shoot, especially if it involves travelling long distances.
WindGuru (http://www.windguru.cz/int/) :
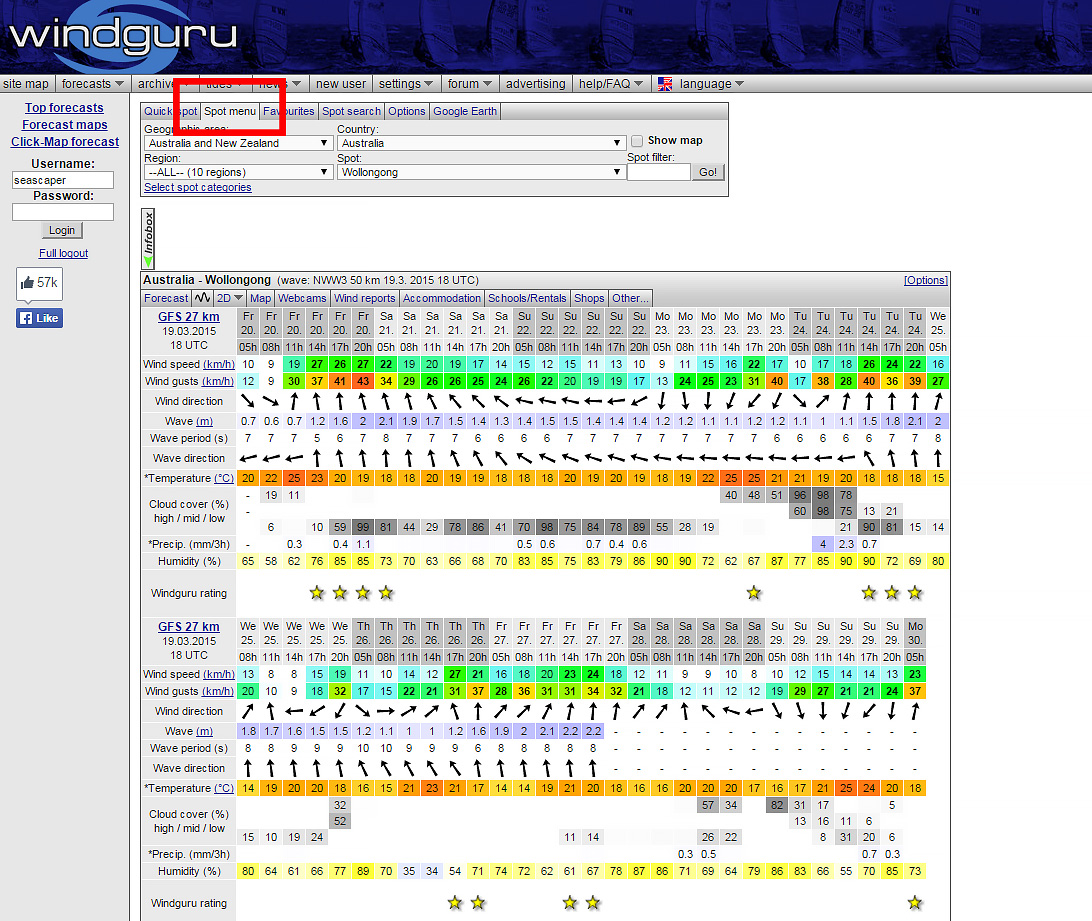
WindGuru’s main focus is on wind conditions, used by sailors and windsurfers. However it also lists cloud percentages broken down into high, medium and low level clouds. After loading the main page you’ll be looking at this sort of screen :
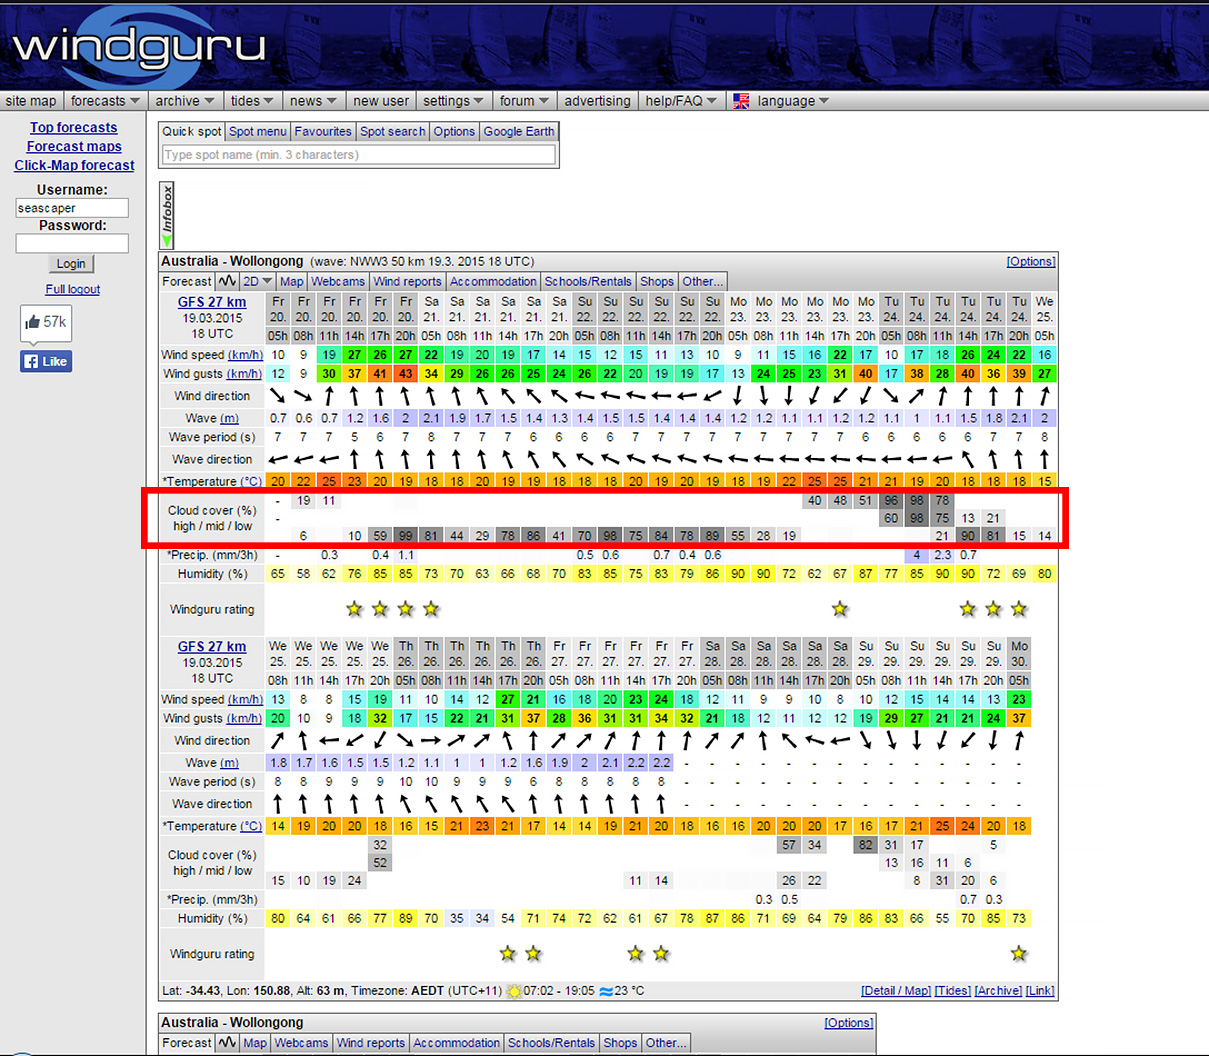
Here in the red box you can see how the cloud percentage information is displayed. As it reads in the left hand column, the high cloud runs along the top row, then the medium cloud and then the low. Worth noting here is the precipitation number listed just under the low cloud row. I would suggest you take any rain prediction numbers with a grain of salt (just like the weatherman on the TV news !).
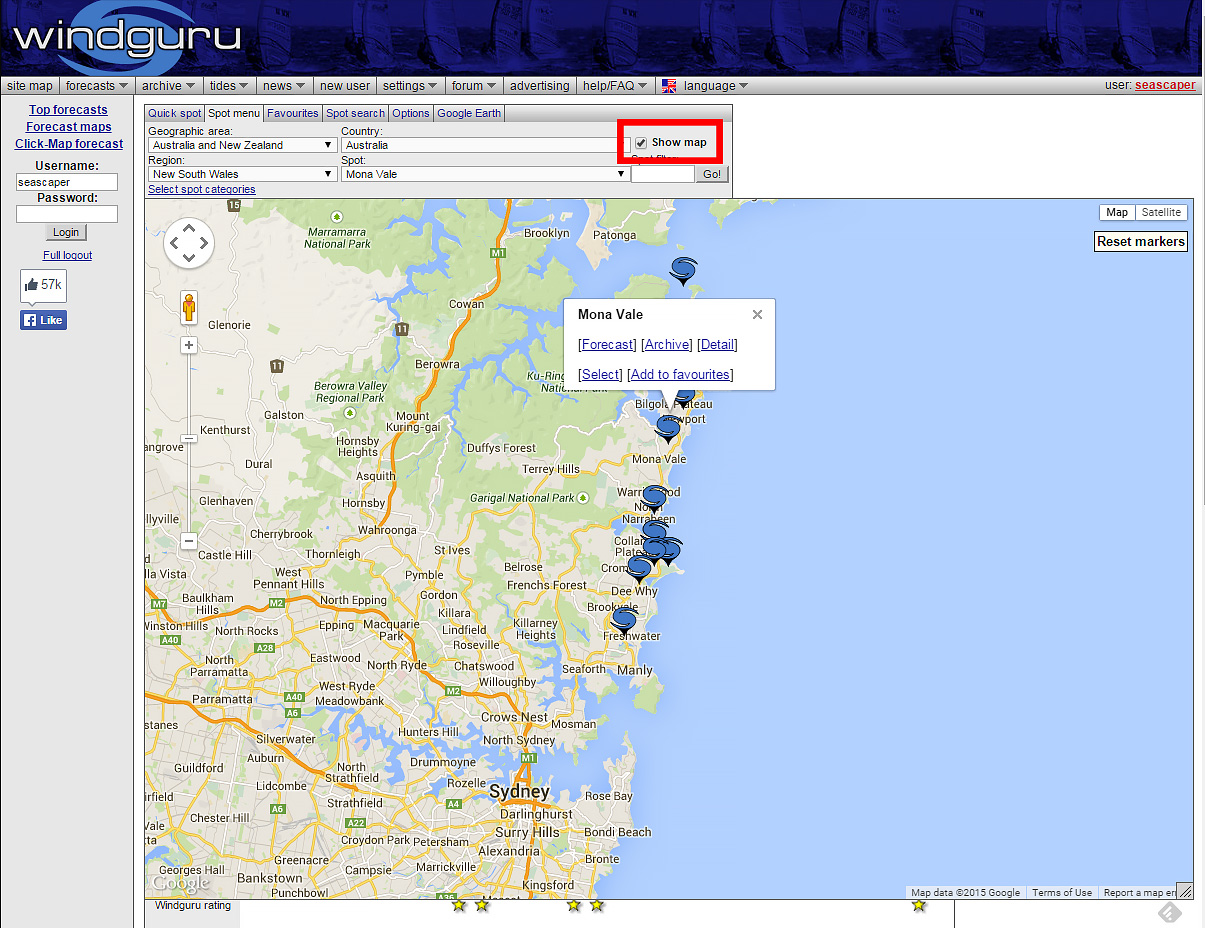
To change the location, click on the “Spot menu” tab located here :
From here use the drop down menus to select geographic area, country, region and spot (location). You’ll see that some of the locations use strange names or nicknames. If you are unsure, next to the drop down menus is a check box for “show map” which will allow you to view where the spots are located and zoom in to select the one you want to view.
At this point you may be comparing SkippySky and WindGuru and seeing some differences in cloud prediction, even 12 hours prior to the morning of your shoot ! Welcome to the fun of judging what the sky will be like, and this leads me to the third site, WeatherZone.
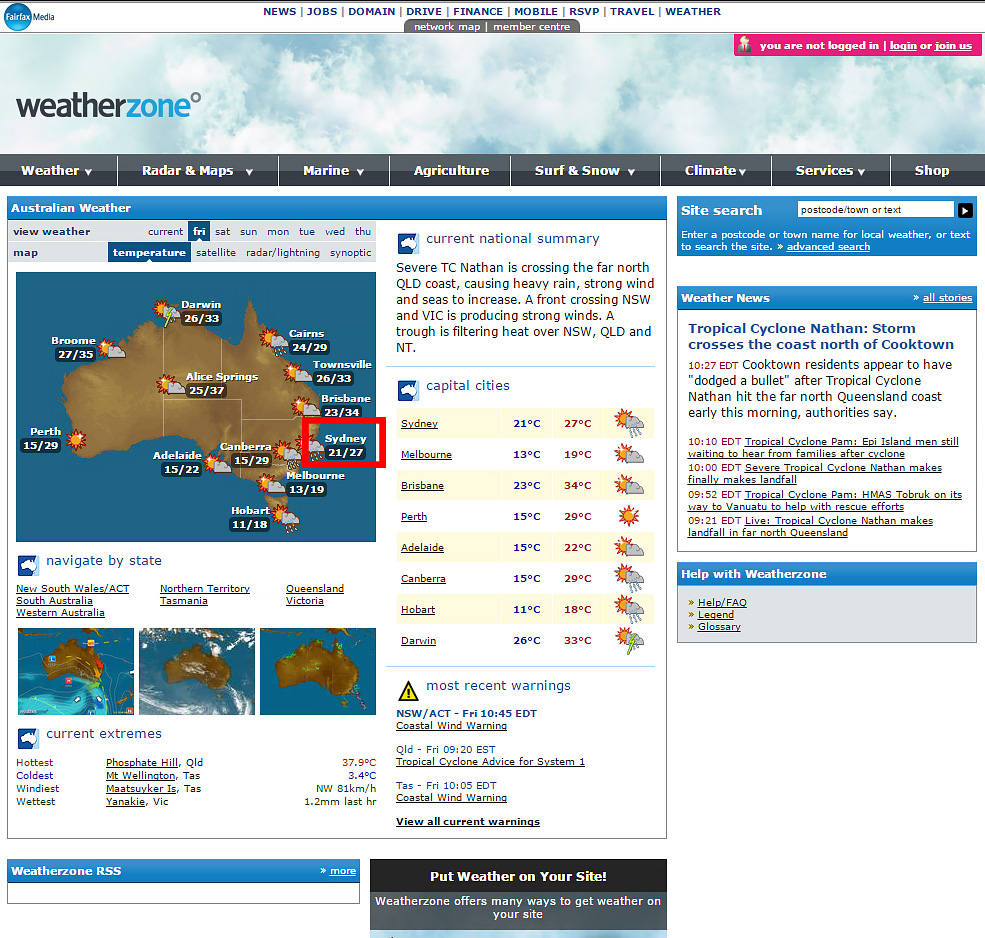
WeatherZone (http://www.weatherzone.com.au/)
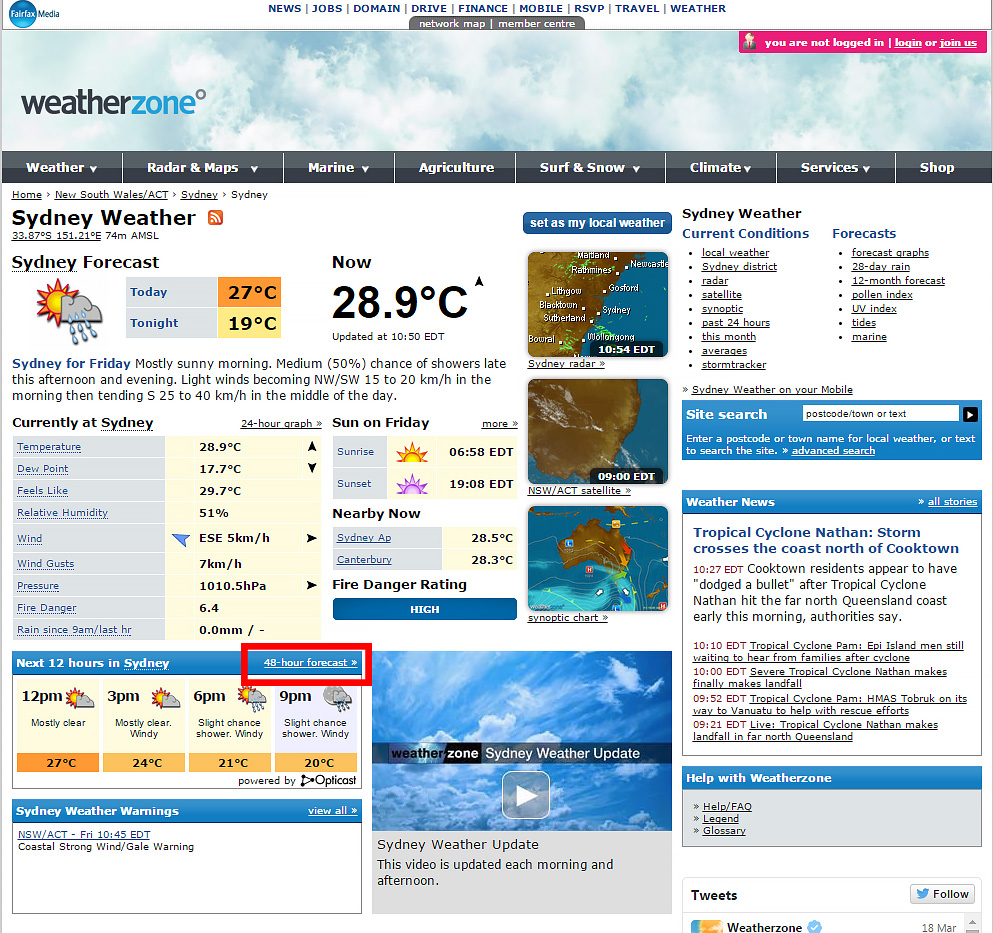
WeatherZone is a general weather site, but buried in it’s numerous menus is a display that shows cloud percentages. To find them, start on the main page and navigate to Sydney.
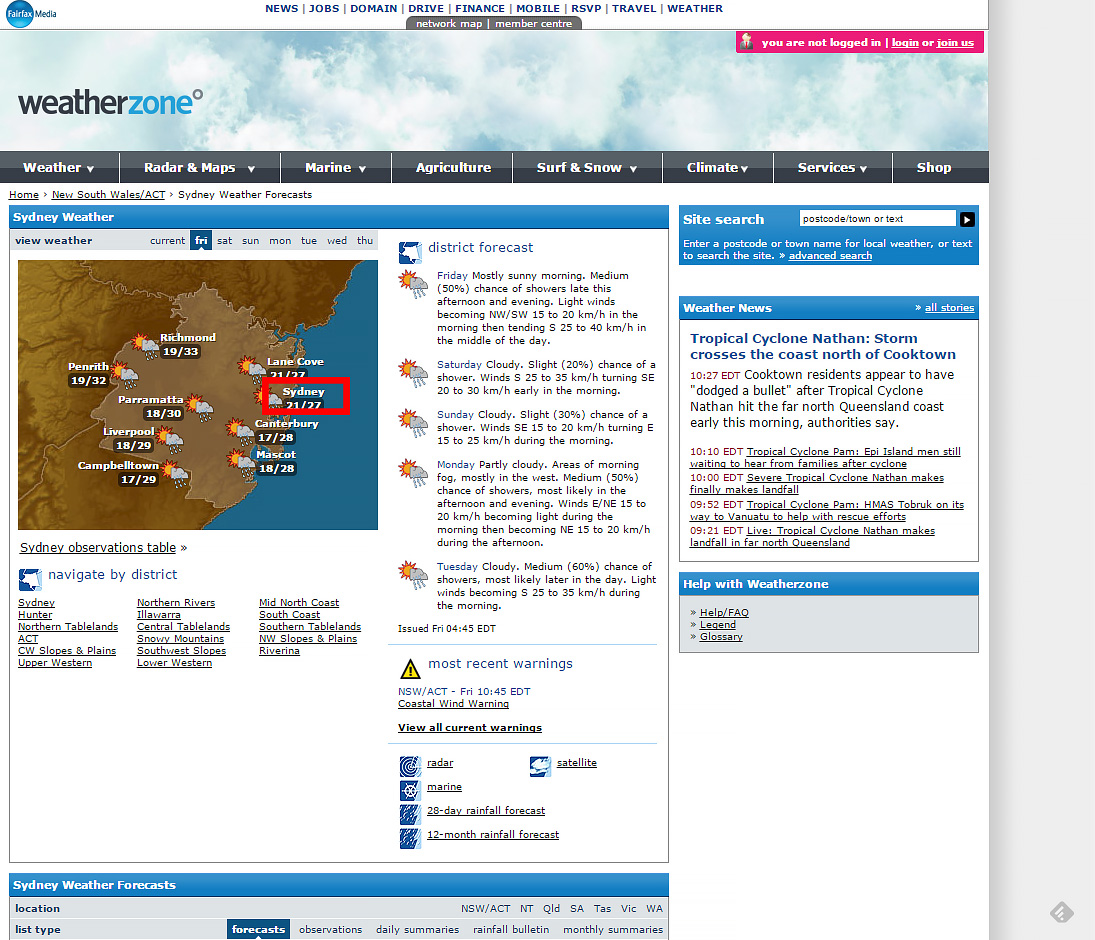
From here click on the Sydney link again to get through to the next page.
Once you’re on this page, click on the “48-hour forecast” link.
On this page you’ll now see the 48 hour forecast, which includes a column displaying cloud percentages. Generally WeatherZone seems to have the most accurate cloud forecast, however it doesn’t display the cloud levels, just a percentage.
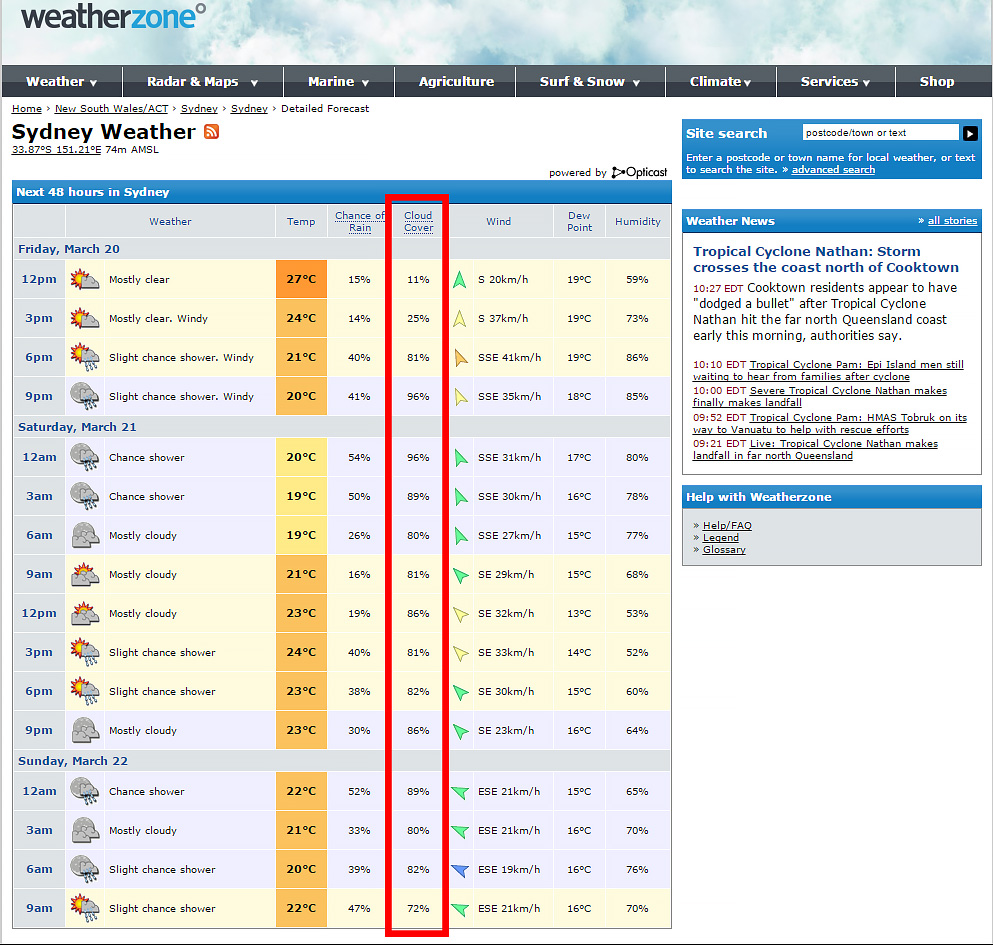
From here, if you want to check another location, you can use the search bar at the top to put in a location and navigate to its 48 hour forecast from there.
I hope you find this guide useful, and it assists you in being able to make a decision on whether or not to get up at oh-my-god-oclock to capture that great sky.
Glenn Crouch — link to portfolio https://500px.com/glenncrouch