
Why Do I shoot panoramas?
The answer to this question has evolved over time. Or more correctly, I actually have an answer to this question whereas previously, the justification was quite vague. These days I tend to see the world in a ratio of at least 2:1 or wider. The wide aspect ratio is ingrained in my psyche. Originally I shot panos to try and get the resolution you see coming from the scanned 6×17 transparencies of the traditional Landscape standards like Ken Duncan. In 2010 when I started, most of the established names still produced 6×17 images. Following that path is really what drew me to the pano. Then I got carried away trying to fit every possible element of a scene into my image when I realised the pano could basically capture any scene, any field of view in any resolution you wanted. Over time my techniques and focus have evolved. My panos are often much simpler, 2 or 3 shot long exposures. At the extreme end however I still like to push the boundaries and shoot beyond the point that conventional wisdom would tell you to stop. The pano has become something that I use in a bid to distinguish my work in a sea of enormous talent and creativity. The following document collates some of my thinking on why and how I shoot panos and presents a recent example to elaborate my workflow.
Composition
I don’t always produce images in a panoramic ratio, sometimes it is clear that wide doesn’t suite. To make sense to me, a wide aspect ratio image has to have a focal point and the inclusion of the peripheral information in the scene must contribute to the overall impact of the shot. Ideally I like a composition that leads the eye to my focal point. I have a preference for strong lines and this is reflected in my subject matter, more often than not urban scenes.
Whereas originally I shot very wide angle beach scenes just because it was new and exciting, now I try to be more considered with my approach to the panorama. I sometimes shoot panos with print resolution in mind. Other times I’m just out and about with a single lens and want to capture the whole scene so I blast away and fill my memory card with blury hand held frames. Above all I experiment to see what works and what I like.
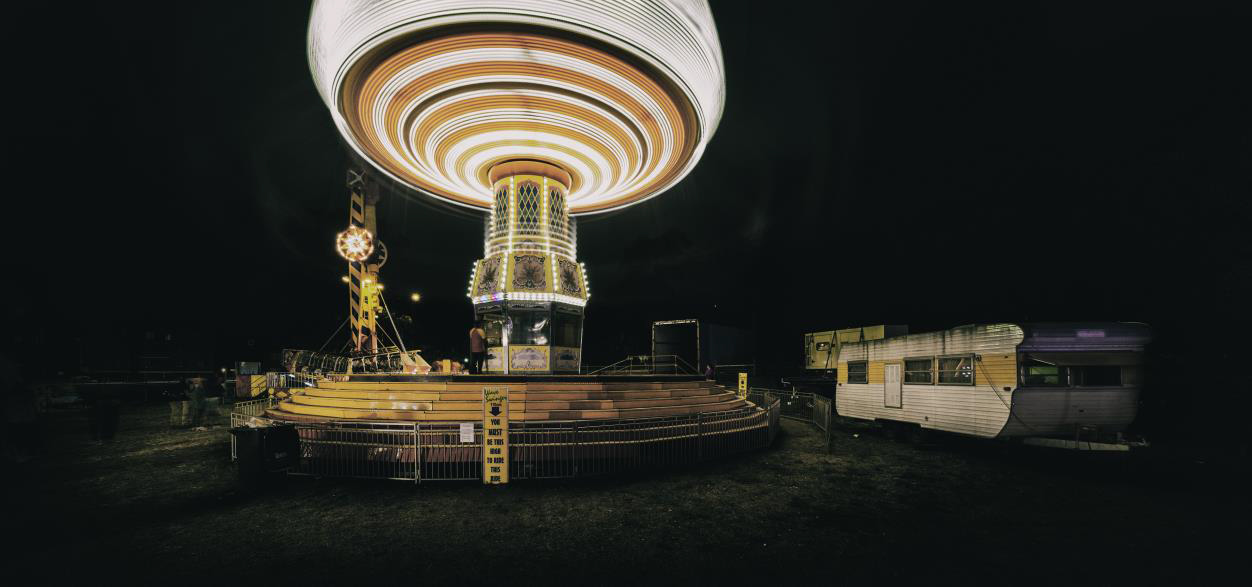
Each element in the panorama adds to the story including the dark space near the edges of the frame
Projections
The panorama is an abstraction. Stitching algorithms take a multitude of photographs taken at different angles recording three dimensional objects and attempting to project them to make a two dimensional image. Just like maps that you used in primary school, the software has to use a projection or mathematical model to achieve this. The projection chosen affects the finished look and resolution of your panorama. As someone who mostly shoots urban scenes, I am generally looking for a projection that keeps my lines straight. Planar projections keep lines straight so this is my default position. However every projection has its good and bad points. Planar projections tend to distort the relative size of objects and therefore its generally recommended to keep your pano field of view less than 120 degrees if you intent to use a planar projection.
Don’t get too bogged down in the details. If you want to learn more just google it. Suffice to say if you want lines straight in all directions, use a planar (sometimes called rectilinear) projection and don’t go too crazy with the field of view. And don’t forget to experiment with using spherical and other projections to warp your images. Sometimes this works brilliantly to add drama to an image.
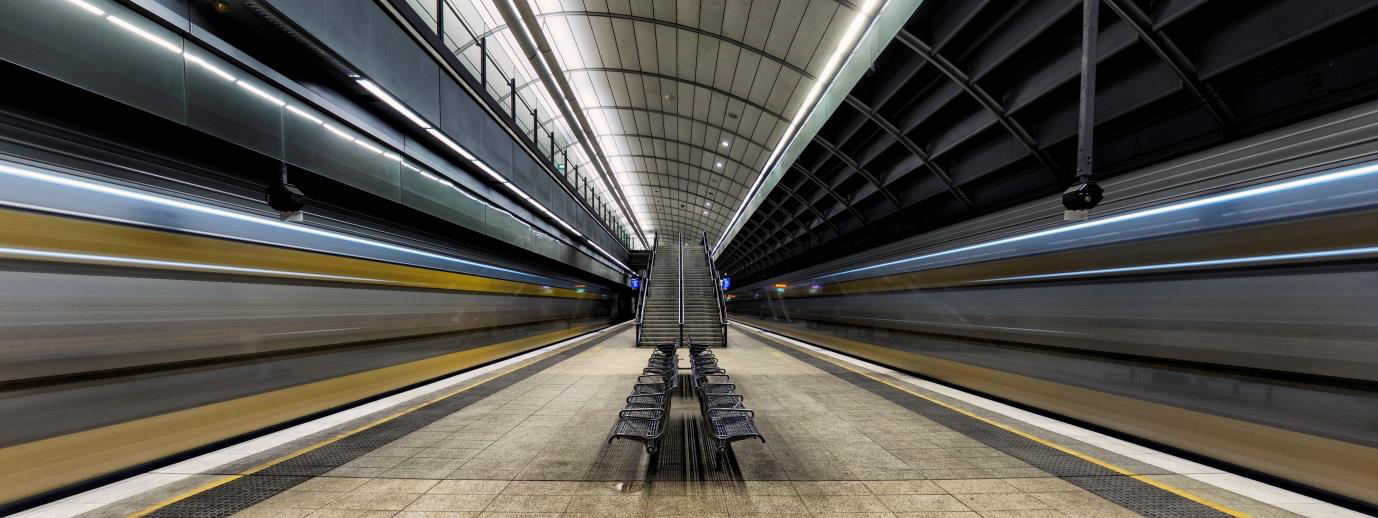
An ultra wide angle panorama with planar projection to preserve linearity
Hardware
I shoot all my panos using my Fuji X-E2 mirrorless camera (1.54 crop factor) and a Bushman Gobi compact multi-row pano head. I use a wide range of lenses when shooting panos from my Fuji 10-24mm to my Canon 70-200mm F4. My most used pano lens at the moment would be the Fuji 14mm F2.8 lens as its super compact, sharpish and has low distortion. I often use the Fuji 18-55mm zoom lens. It isn’t far off the quality of the expensive 24-70mm lenses for full frame cameras and covers a similar field of view range on a crop sensor camera.
Absolute technical quality is not my objective and this is reflected in my camera and lens choice. If it was I would take the time to adjust my setup to achieve the best no-parallax point, shoot a full frame camera and use an expensive tilt shift lens, but I don’t! I like to make life difficult for myself.
I shoot with the mood of a scene in mind and this usually requires flexibility, not optimum sharpness so my style has evolved to be able to capture any scene under any conditions rather than achieving technical perfection.
I also shoot hand held panos quite often. Don’t let gear (or lack of) stop you from trying. If you have a camera and photoshop, you can pano.
Software
Adobe Bridge, Adobe Camera Raw, Autopano Giga, Adobe Photoshop and the NIK suite are my tools. I use pretty much the same workflow on every image and I use very similar NIK filters and levels or adjustment. My workflow has been static for a while, it probably needs a shakeup.
I couldn’t do some of what I do using Photoshop for my stitching. Autopano really is the key to the speed with which I can produce corrected and well exposed panoramas. If you want to shoot panoramas, practice using Photomerge in Photoshop and if you identify a need for more flexibility, you should seriously investigate the dedicated stitching programs such as Autopano, PTGUI and the like but don’t open up that can of worms until it is necessary. As a general rule, I find Autopano far quicker to get into and get a result out of whilst PTGUI provides many more options. More projections, better exposure blending and better fine tuning of the process. I tend to take shortcuts and do things the easy way so Autopano suits me.
Hand Held Shooting
I shoot a lot of my panos hand held which is both a blessing and a curse. it means you can shoot quickly and be flexible. The downside is you tend to produce a lot images and these all require processing time. Be judicious with the pano! Only pano when required.
When shooting hand held, I tend to cradle the lens between thumb and fore finger. I imagine my hand is a pano head. I try to rotate the lens using my fingers around where I think the no parallax point is. Don’t hold the camera up to your eye and rotate your head and body. You will invariably move your camera and lens much further and are more likely to have stitching dramas. Try it next time you have some good daylight. I’ve shot 360 degree panos like this and it has worked! You could also try a string tripod. Google it!
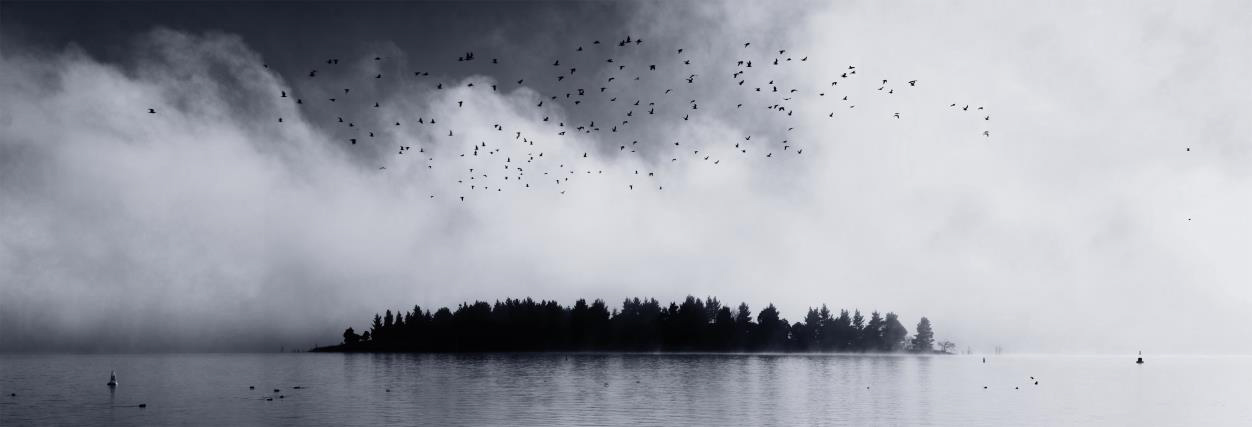
A 7 shot hand held panorama. Manual blending was required to manage the birds between frames
Perspective Correction
Over time I’ve come to be an upright person. I like my vertical lines to be vertical. This is a preference sort of thing. Learn how to get your vertical lines vertical either in your stitcher, using the perspective tool in photoshop or using the adaptive wide angle filter in photoshop CC. For commercial work you will need to know how to do this. Chances are you will also need to know how to get your verticals not quite vertical. Have a look at most architectural images. Buildings are nearly vertical but not quite. There is an art in getting that just right.
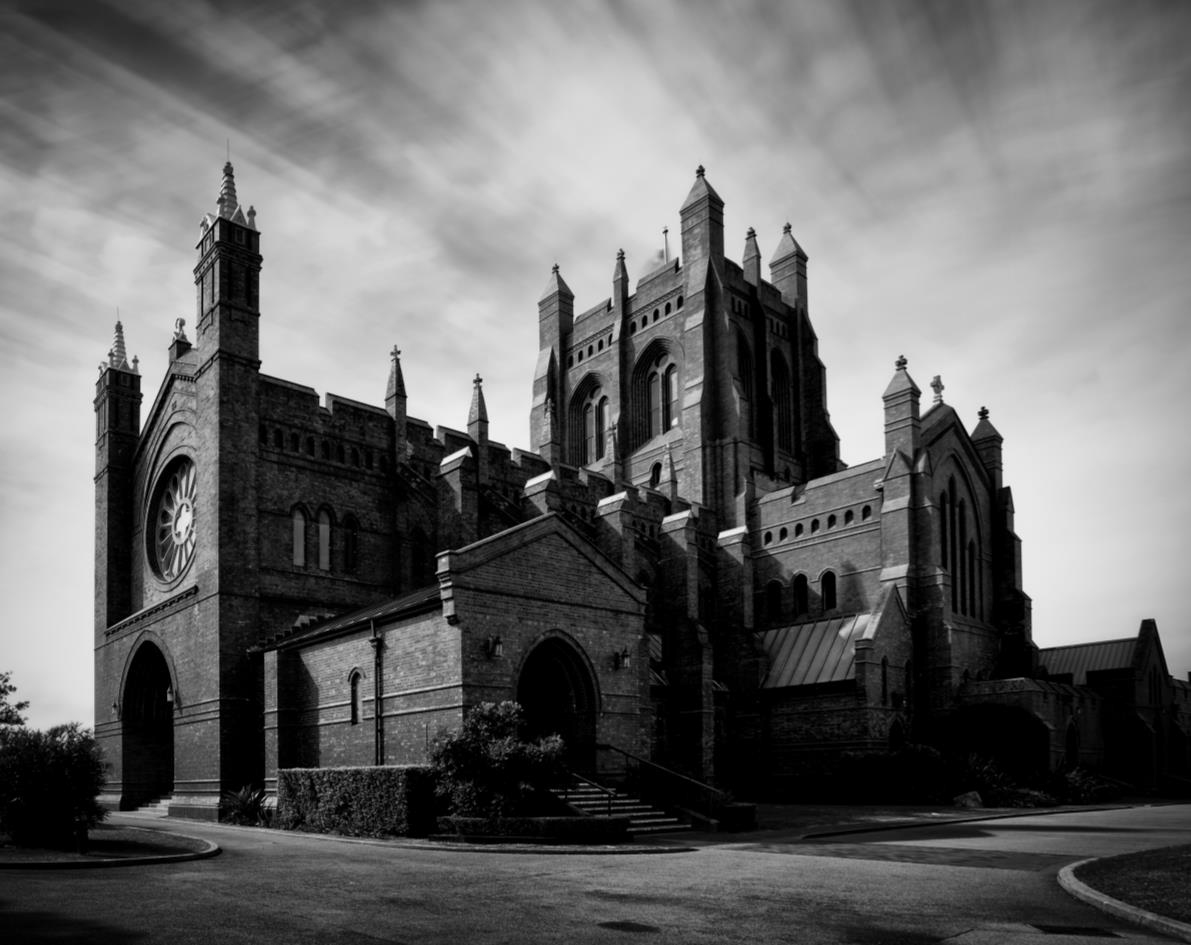
A perspective corrected panorama with vertical lines set to vertical
Issues
The pano has downsides of course. You will shoot many more frames if you are bracketing. Handling motion in the scene can be difficult and the biggest issue of all I find is time. If you are shooting long exposures, the light changes rapidly so it may vary from one end of the pano to the other. Here is a brief list of problems and work arounds:
- Storage / Number of frames shot – Talk is cheap and so are memory cards and storage. Overall you’ll probably shoot less panos than you would individual frames so if you delete intermediate working files and clean up and RAW pano sequences you know you will never use, dont sweat it.
- Exposure – This can vary dramatically across a wide scene and also with time as you work through the pano sequence. If you have amazing light and are shooting long exposures, try shooting wider with say 3 frames in landscape orientation. Better to get the light than work with sub-standard base images. Don’t be afraid to try bracketing either and if need be, adjust your graduated filters (if you use them) as you move through a sequence
- Motion – use long exposures to smooth water. Shoot multiple images of each portion of the scene to give you a better chance of matching waves etc. Manually time your shots to avoid moving cars or people in urban scenes and also consider stacking to remove people in busy scenes or control what is and isn’t in your scene
Also, check out Ian’s “Making of the Belly of the Beast” – a walk through on how he constructed his award winning image. Click here.
You can find more of Ian’s photos on:
Website: http://www.focusedphotography.com.au