
The following Star Trail article was written by the talented photographer – Rodney Campbell. He talks about post processing star trail source images in Lightroom, stacking these as layers in Photoshop and finally blending the resulting image with a foreground photo.
His basic star trails post processing workflow:
Camera settings for this series: ISO 800, Focal Length 14 mm, f 3.2 Exposure time 45 sec. Total number of photos to stack 111.
– adjust all the source images in Lightroom with a common set of synchronised basic adjustments (lens correction, white balance, some basic panel adjustments and maybe some tone curve) (Image 1)
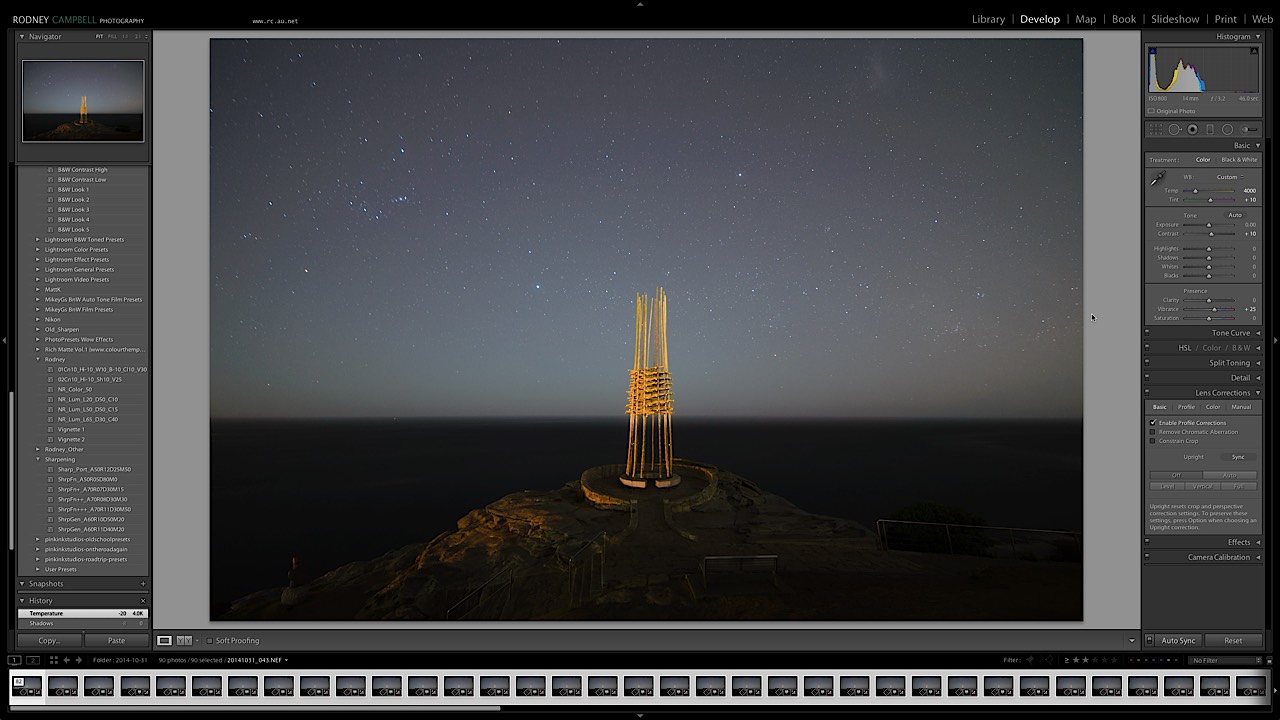
Image 1 – Load and Sync develop settings in Lightroom
– open all the images as layers in Photoshop from Lightroom (Image 2)
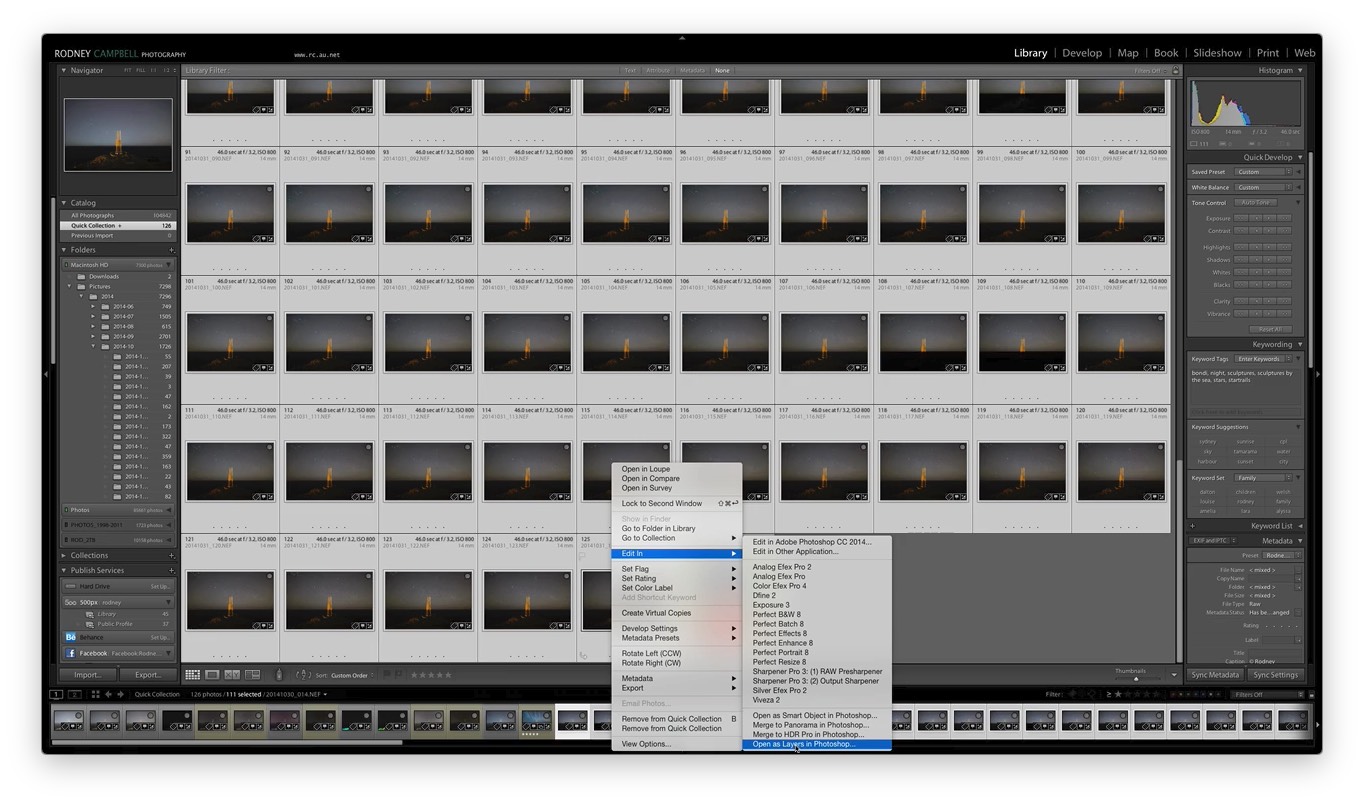
Image 2 – Select all images and open as layers in Photoshop
– manually fix any images which need fixing (e.g. cloning out plane, boat, etc trails from specific source frames)
– select all the layers and change the blend mode to Lighten (Image 3)
– if all looks good flatten the image and save
– at this stage I’m not normally worried about what the foreground in this image looks like as I’m going to blend in the foreground from some of the other shots later
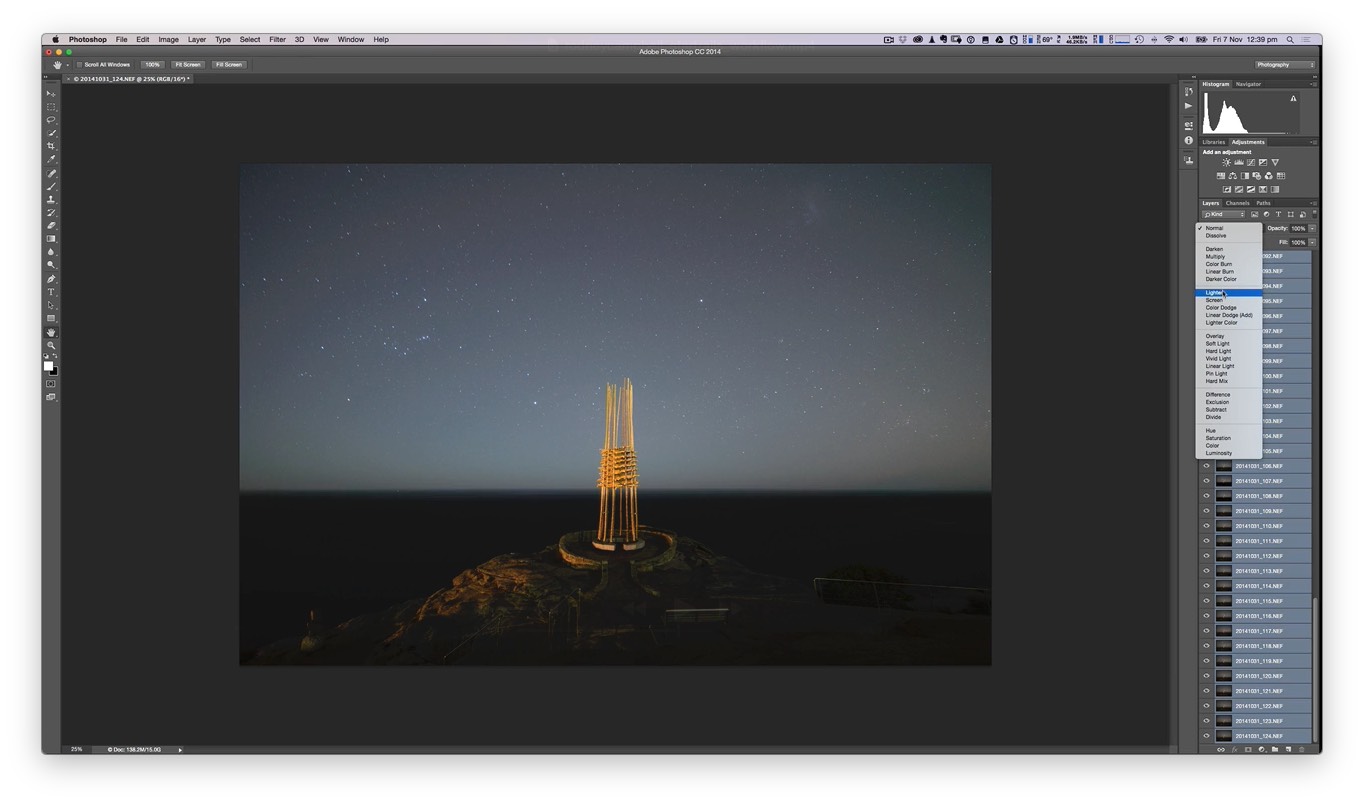
Image 3 – Select all the layers and change blend mode to Lighten
– open the image again in Photoshop and
– convert the image to a smart object
– apply Camera RAW as a filter and adjust the image to taste – only really caring about the results to the sky and star trails
– adjust the colour temp if required – often want to make it a little bluer
– boost the highlights and whites
– boost the blacks
– add some clarity and saturation if required (Image 4)
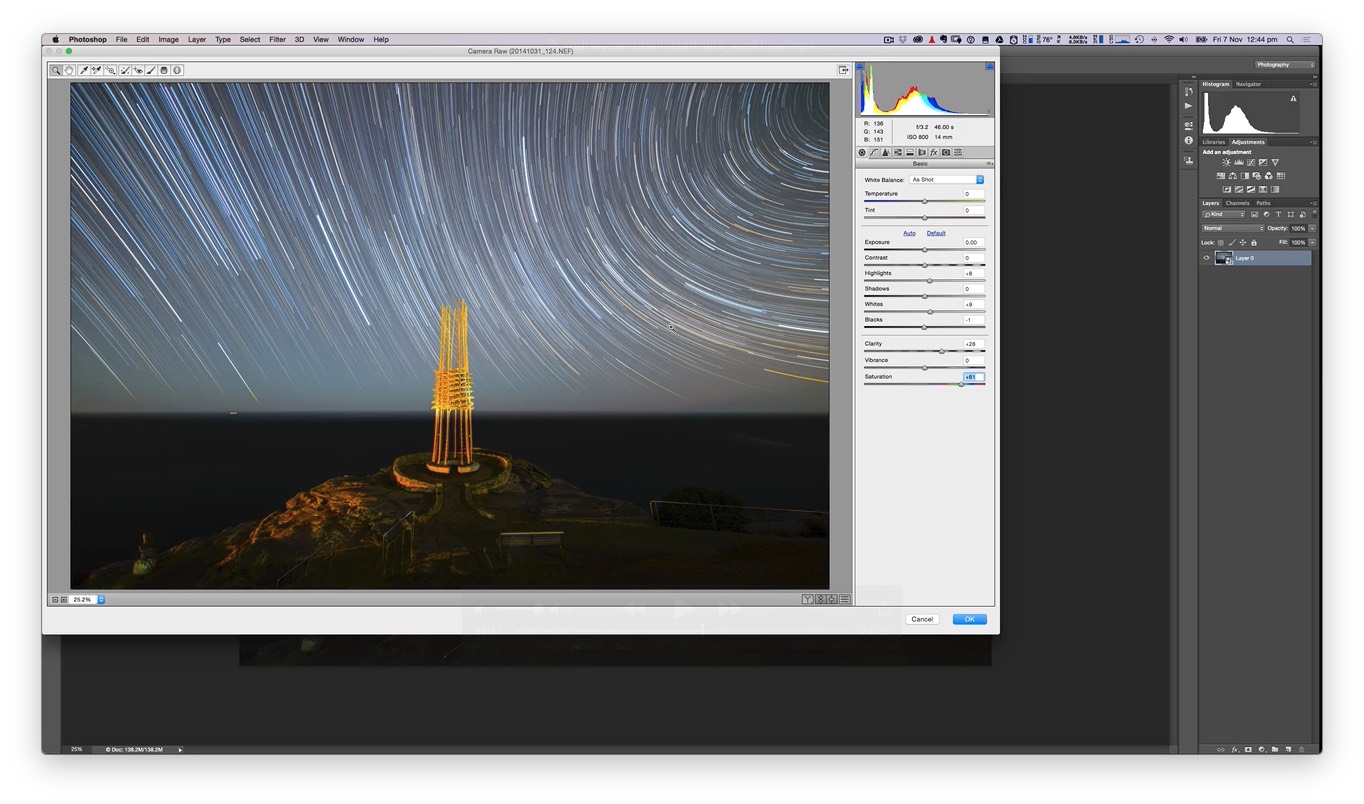
Image 4 – Open in Camera Raw and adjust the trails as desired
– run a Luminosity mask creation action
– go to the Alpha channels and select one of the masks which essentially selects the star trails (some form of lights)
– create a curves layer with this mask and adjust to boost the highlights a little more
– go to the Alpha channels and select one of the masks which essentially selects everything which isn’t the star trails (inverse of above)
– create a curves layer with this mask and adjust to bring down the dark areas a little (to darken the background sky) (Image 5)
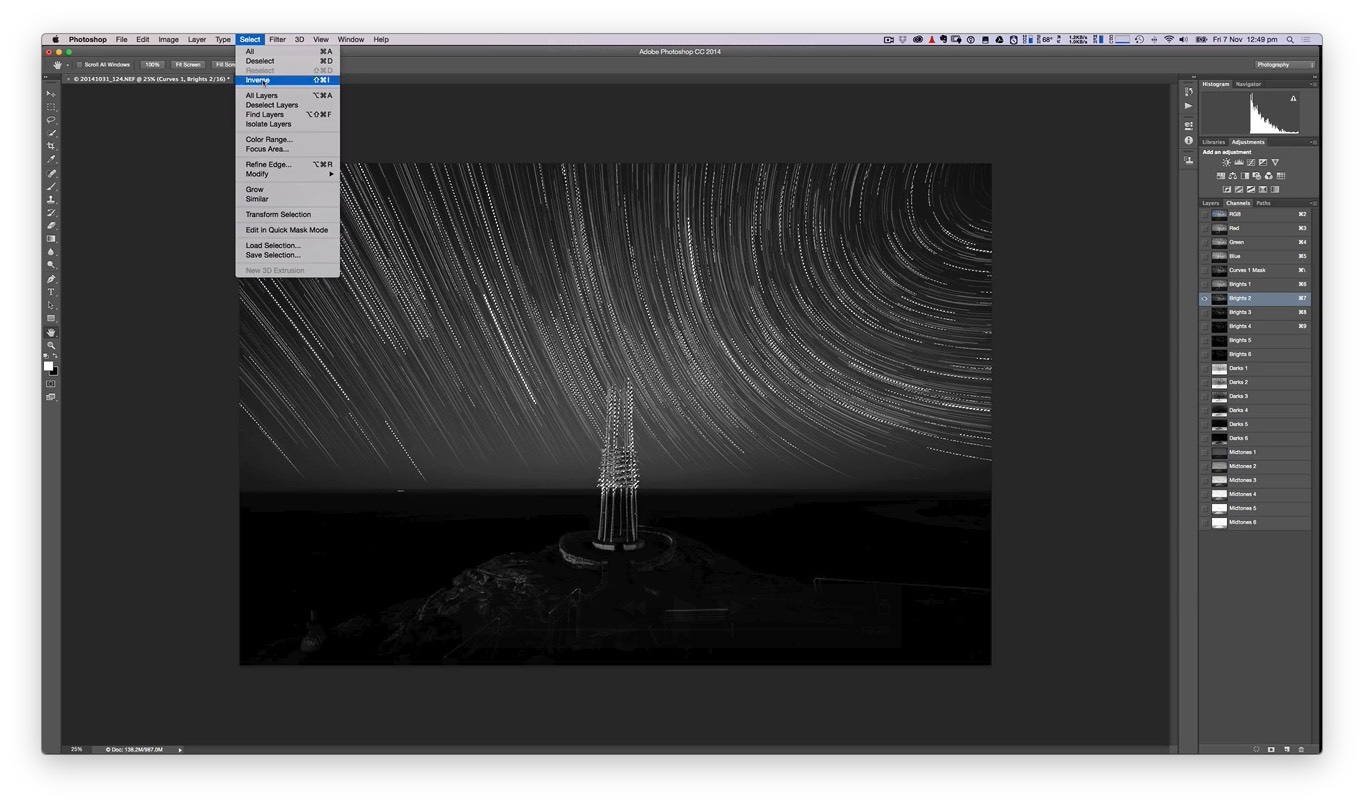
Image 5 – Run a luminosity mask creation action
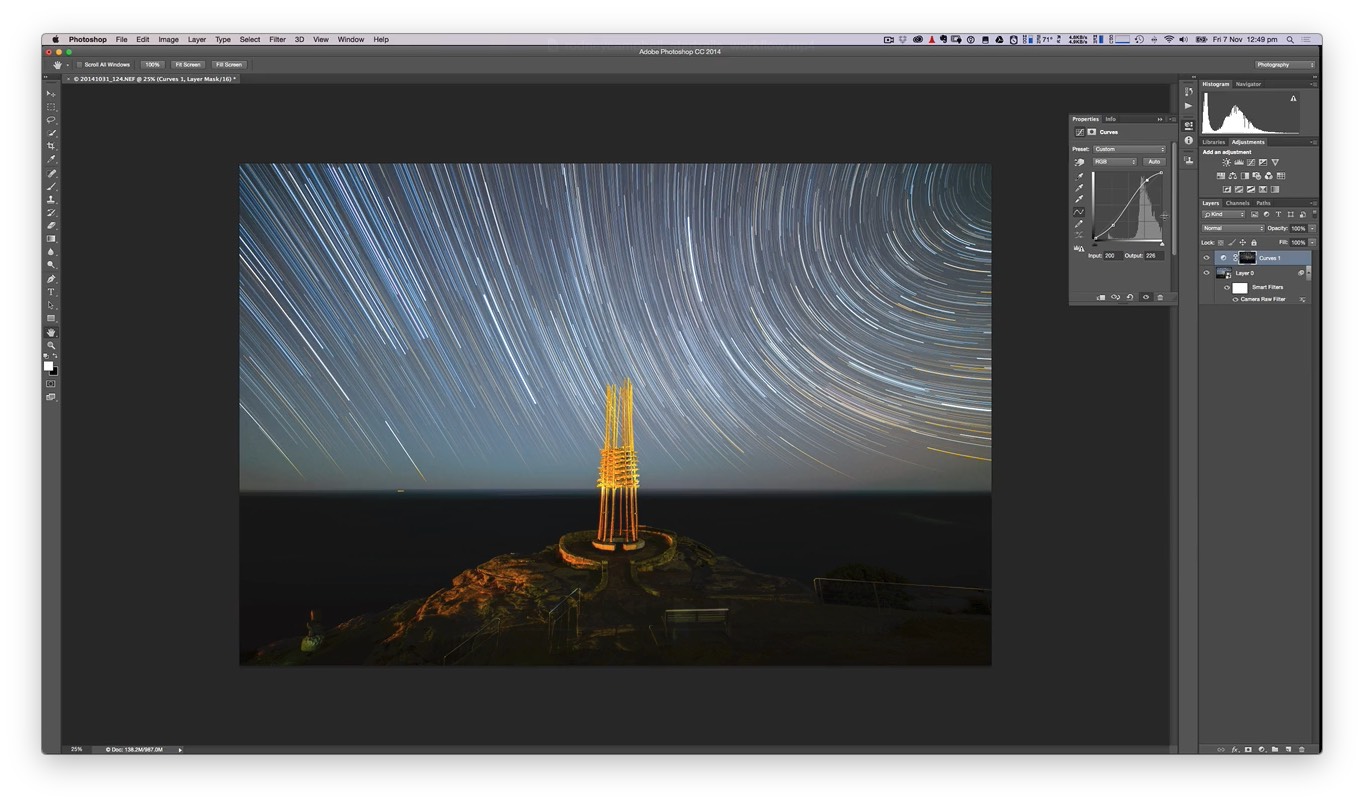
Image 6 – Adding contrast with a curves layer in Photoshop
– now open up the one or more foreground interest source images in photoshop (Image 7) (often light painted) and drag them one by one into the other star trails document so they appear as layers above the background trails image
– add an inverse (black) mask to each of those layers so they don’t appear (option click the layer mask icon)
– for the foreground I mostly want to use I might use the gradient tool (with black to white transition) to quickly paint in a large section of one of the source foreground images
– for each of the foreground layers I can now paint with a white brush on the mask with a low opacity/low flow brush and my Wacom pressure sensitive pen/tablet to expose the areas of those layers I want to show through creating the final blended image
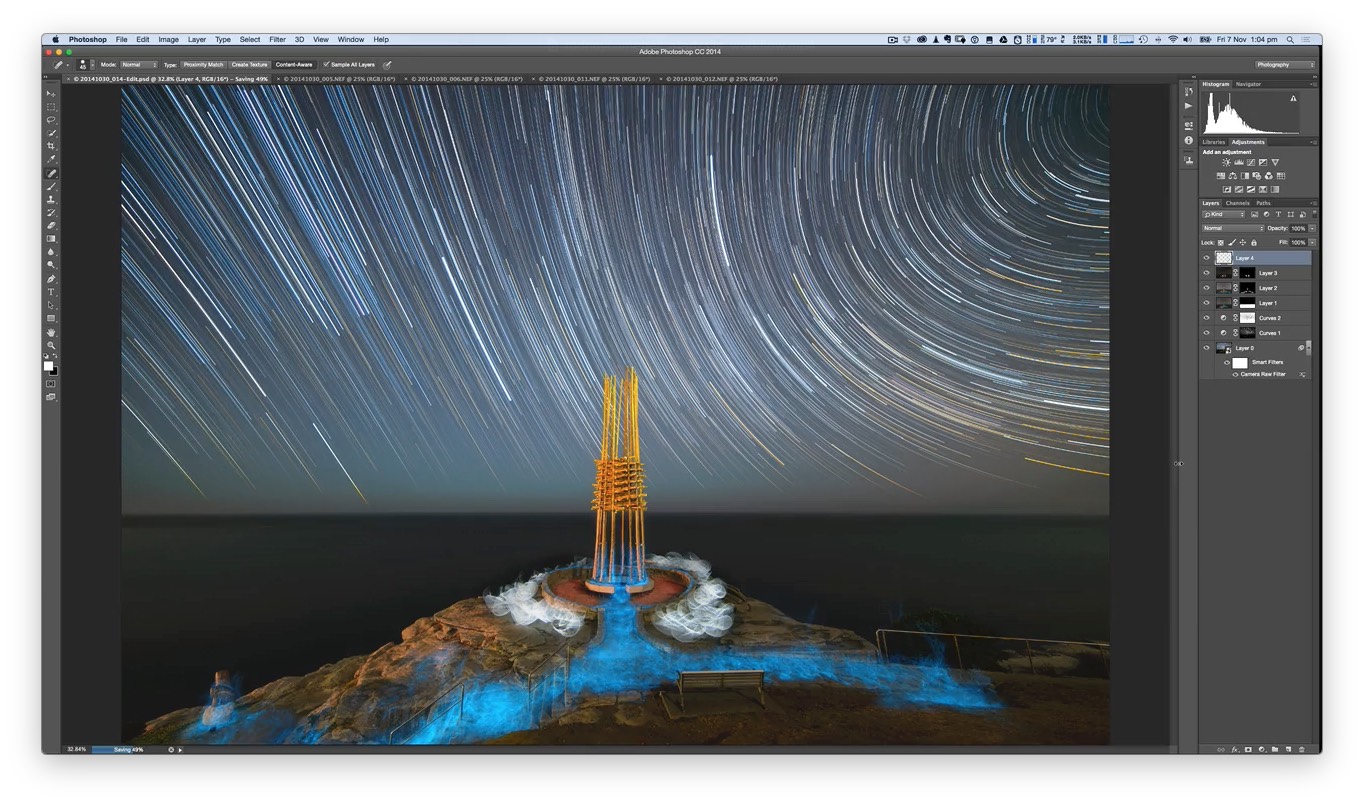
Image 7 – Foreground interest
For a detailed walkthrough – check out Rodney’s youtube tutorial: https://www.youtube.com/watch?v=lv9xTYwxJdI
You can find out more about Rodney Campbell on:
His Blog: http://www.rc.au.net/blog/
Facebook: https://www.facebook.com/rodwc?fref=ts